Are you tired of looking pale and ghostly? Do you want to achieve a sun-kissed glow without exposing your skin to harmful UV rays? Look no further, as self tanning for beginners is here to save the day! With the rise in popularity of fake tan, achieving a bronzed look has never been easier. However, for those new to the world of self tanning, the process can seem daunting. That's why we've put together this guide to help you say goodbye to ghostly skin and hello to a natural-looking tan.
The Science of Self-Tanning: Understanding How It Works
Self-tanning may seem like magic, but there's actually some fascinating science behind it. Understanding how self-tanning products work can help you achieve the perfect sun-kissed glow.
Fake tanning products contain a chemical called dihydroxyacetone (DHA). When DHA comes into contact with the amino acids in the dead cells on the surface of your skin, it undergoes a chemical reaction called the Maillard reaction. This reaction causes the skin to darken, giving you a tan.
The key to achieving a natural-looking tan is in the formulation of the self-tanning product. Different products contain varying concentrations of DHA, which determines how dark your tan will be. It's important to choose a product with a concentration that suits your desired level of tan.
In addition to DHA, self-tanning products also contain other ingredients such as moisturisers, antioxidants, and bronzers. These ingredients help to hydrate your skin, protect it from free radicals, and enhance the immediate tanning effect.
When you apply a self-tanning product, it's important to evenly distribute it over your skin to avoid streaks or patches. Start with a small amount and gradually build up the tan if desired. Be sure to exfoliate and moisturise your skin beforehand to create a smooth canvas for the self-tanner.
The development of your tan will take a few hours, with the full effect typically appearing within 24 hours. It's important to note that self-tanners do not provide any sun protection, so be sure to apply sunscreen if you plan on being in the sun.
The duration of your tan will depend on various factors, such as your skin type and how well you care for your skin. Generally, self-tans last for about a week before fading gradually. To prolong your tan, moisturise daily and avoid activities that can cause your skin to exfoliate quickly, such as swimming in chlorinated water or using harsh exfoliants.
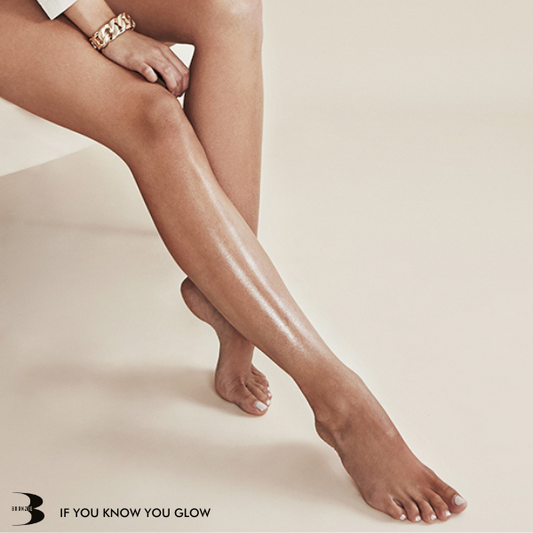
Now that you understand the science behind self-tanning, you can confidently embark on your journey to achieve a gorgeous, sun-kissed glow. Remember to choose the right product for your desired level of tan, follow the proper application techniques, and take care of your skin to maintain your tan for as long as possible.
Choosing the Right Product for You: From Mousses to Lotions
When it comes to self-tanning, there is a wide variety of products available, each with its own unique formula and application method. Choosing the right product for you can be overwhelming, but fear not! We're here to break down the different types of self-tanning products, from mousses to lotions, to help you make the best choice for your needs.
Mousses: If you're looking for a lightweight and easy-to-apply option, mousses may be the way to go. These products typically have a whipped consistency that glides onto the skin smoothly. Mousses are great for beginners because they provide instant colour payoff, allowing you to see exactly where you've applied the product.
They also tend to dry quickly, minimising the risk of transfer onto clothes or sheets.
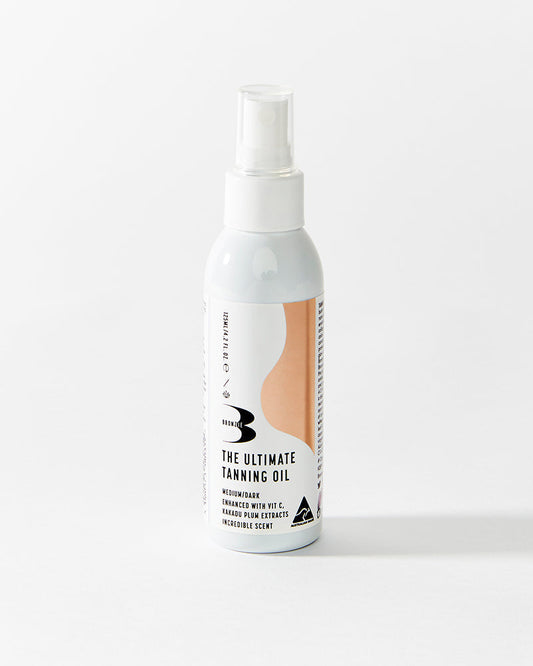
Sprays: Self-tanning sprays are a convenient option, especially for hard-to-reach areas like your back. They come in aerosol cans and are typically applied by spraying the product onto the skin. Sprays provide an even and seamless application, making it easy to achieve a natural-looking tan. Just be sure to hold the can about 15 centimetres away from your body to avoid any streaks or unevenness.
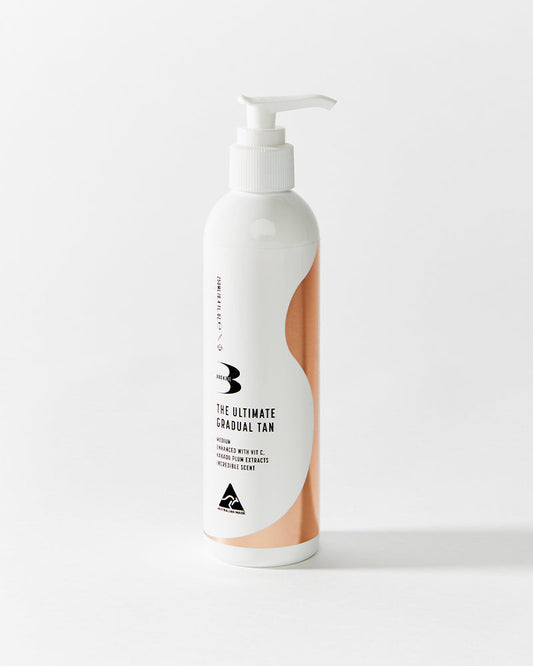
Lotions: If you prefer a more hydrating and nourishing formula, self-tanning lotions may be your best bet. These products often contain moisturising ingredients like aloe vera or shea butter, leaving your skin feeling soft and supple. Lotions are generally thicker in consistency and take longer to dry, so they're ideal for those who want a slower and more controlled application process.
Gel: For those with oily or acne-prone skin, self-tanning gels can be a game-changer. Gels are lightweight and non-comedogenic, meaning they won't clog your pores or exacerbate any existing breakouts. They provide a cooling sensation upon application and are quick to dry, making them perfect for those who are always on the go.
Towelettes: Tanning towelettes are the ultimate travel-friendly option. These pre-soaked wipes are easy to use and mess-free, making them great for touch-ups or on-the-go tanning. Simply swipe the towelette over your skin in a circular motion, and voila – a natural-looking tan without any hassle.
Remember, everyone's skin is unique, so it may take some trial and error to find the perfect self-tanning product for you.
Step-by-step Guide to Achieving a Sun-Kissed Glow
Now that you have chosen the perfect self-tanning product for you, it's time to embark on the journey to achieve a gorgeous, sun-kissed glow. Follow this step-by-step guide to ensure a flawless and natural-looking tan.
1. Prepare Your Skin: Before applying any self-tanning product, it's important to exfoliate your skin to create a smooth canvas. Use a gentle exfoliator to remove any dead skin cells and ensure an even application. Pay special attention to dry areas like your elbows, knees, and ankles, as these areas tend to absorb more product and can result in a darker appearance.
2. Moisturise: After exfoliating, apply a moisturiser to hydrate your skin and create a barrier between the self-tanner and any dry patches. This will help the self-tanner glide on smoothly and prevent it from clinging to any dry areas. Be sure to choose a moisturiser that is lightweight and absorbs quickly.
3. Choose Your Application Method: Depending on the type of self-tanning product you've chosen, follow the specific instructions for application. If you're using a mousse, pump a small amount onto a tanning mitt or glove and blend it onto your skin using circular motions. If you're using a lotion or gel, apply a small amount directly onto your skin and massage it in until it's evenly distributed. Remember to start with a small amount and gradually build up the tan if desired.
4. Blend, Blend, Blend: Whether you're using a mousse, lotion, or gel, the key to achieving a natural-looking tan is to blend it well. Use long, sweeping motions to ensure an even application and avoid any streaks or patches. Take your time and be thorough, paying attention to hard-to-reach areas like your back and behind your knees.
5. Wash Your Hands: After applying the self-tanner, it's crucial to wash your hands immediately to avoid any staining. Use soap and water to remove any product from your palms, fingers, and nails. You can also use a damp cloth or baby wipe to wipe away any excess self-tanner from your hands.
6. Allow Time for the Tan to Develop: The self-tanning process takes time, so be patient. Allow at least 6-8 hours for the tan to fully develop before showering or coming into contact with water. During this time, avoid sweating or doing any activities that could cause the self-tanner to smudge or rub off.
Dos and Don’ts of Self-Tanning
Now that you have all the necessary information on self-tanning, it's time to dive into the dos and don'ts of achieving a flawless tan. Follow these tips to ensure a successful and natural-looking result.
1. Do exfoliate before applying self-tanner. This step is crucial for removing dead skin cells and creating a smooth canvas for an even application. Use a gentle exfoliator to scrub away any dry patches and pay extra attention to areas like elbows, knees, and ankles.
2. Do moisturise before self-tanning. Applying a lightweight moisturiser helps hydrate your skin and prevent the self-tanner from clinging to dry areas. It also creates a barrier that allows the self-tanner to glide on smoothly.
3. Do choose the right product for your desired level of tan. Consider the concentration of DHA in the self-tanner to achieve your desired shade. Start with a lower concentration if you're new to self-tanning and gradually build up to a darker tan.
4. Do blend the self-tanner thoroughly. Whether you're using a mousse, lotion, or gel, take your time to blend the product in using long, sweeping motions. This will ensure an even application and prevent any streaks or patches.
5. Do wash your hands after applying self-tanner. Use soap and water to remove any product from your palms, fingers, and nails. This will prevent your hands from becoming unnaturally tan.
6. Do give your tan time to develop. Avoid showering or coming into contact with water for at least 6-8 hours after applying self-tanner. During this time, avoid sweating or doing activities that may cause the tan to smudge or rub off.
7. Don't forget to wear gloves or use a tanning mitt when applying self-tanner. This will protect your hands from getting stained and ensure a more even application.
8. Don't overdo it with the self-tanner. Start with a small amount and gradually build up the tan if desired. It's better to have a subtle and natural-looking tan than to end up looking orange.
9. Don't forget to blend the self-tanner into areas like your wrists, ankles, and neck. These areas tend to absorb more product, so take extra care to blend thoroughly and avoid any noticeable colour differences.
10. Don't wear tight clothing immediately after applying self-tanner.
Prepping Your Skin for a Flawless Self-Tan
Prepping your skin before self-tanning is an essential step to achieve a flawless and natural-looking tan. By taking the time to properly prepare your skin, you can ensure that the self-tanner goes on smoothly and evenly, resulting in a beautiful sun-kissed glow. Here are some tips to help you prep your skin for a flawless self-tan.
First, it's important to exfoliate your skin. This step helps to remove any dead skin cells and create a smooth canvas for the self-tanner. Use a gentle exfoliating scrub or a dry brush to gently massage your skin in circular motions. Pay extra attention to dry areas such as elbows, knees, and ankles, as these areas tend to absorb more product and can result in a darker appearance. By exfoliating, you'll help ensure an even application and prevent any streaks or patches.
After exfoliating, it's crucial to moisturise your skin. Applying a lightweight moisturiser helps to hydrate your skin and create a barrier between the self-tanner and any dry patches. This step will help the self-tanner glide on smoothly and prevent it from clinging to any dry areas. Choose a moisturiser that is lightweight and absorbs quickly, so it doesn't interfere with the self-tanning process.
If you have any areas of your body that are particularly dry, consider applying a small amount of petroleum jelly to those areas. This will create an extra barrier of protection and prevent the self-tanner from saturating those dry areas and resulting in a darker appearance.
Lastly, make sure your skin is clean and free from any oils, lotions, or makeup before applying self-tanner. Use a gentle cleanser to thoroughly cleanse your skin, paying extra attention to areas such as the face, where makeup residue may be present. Removing any oils or residue will ensure that the self-tanner adheres properly to your skin and gives you an even and long-lasting tan.
By following these prepping tips, you'll be well on your way to achieving a flawless and natural-looking self-tan. Remember to exfoliate, moisturise, and cleanse your skin before applying self-tanner, and you'll be able to enjoy a beautiful sun-kissed glow without any streaks or patches. So, get ready to say goodbye to ghostly skin and hello to a radiant and bronzed complexion!
Overcoming Common Self-Tanning Problems
So you've followed all the steps and applied your self-tanner perfectly, but now you're faced with some common self-tanning problems. Don't worry, we've got you covered with some tips and tricks to help you overcome these issues and achieve a flawless tan.
Problem 1: Streaks and Uneven Application
If you notice streaks or uneven patches after applying your self-tanner, don't panic. This is a common problem that can be easily fixed. First, exfoliate the affected area to remove any excess tanner. Then, apply a small amount of moisturiser and gently rub it into the streaky areas. This will help to blend the tanner and even out the colour. If the streaks are still noticeable, you can lightly exfoliate the area again and reapply the self-tanner using a blending mitt or sponge.
Problem 2: Dark Spots or Orange Tint
If you've ended up with dark spots or an orange tint after self-tanning, there are a few things you can do to fix it. First, exfoliate the area to lighten the colour. You can also try applying a mixture of lemon juice and baking soda to the affected areas, as the acid in the lemon juice can help to lighten the colour. If all else fails, you can use a tan remover product to strip away the colour and start fresh.
Problem 3: Uneven Fade
As your self-tan starts to fade, you may notice that it becomes uneven or patchy. To prevent this, make sure to moisturise your skin daily, as dry skin can cause the tan to fade more quickly and unevenly. You can also try using a gradual tanning lotion or a tan extender product to help maintain an even fade.
Problem 4: Tanned Palms or Feet
If you've ended up with tanned palms or feet after applying self-tanner, don't worry – there are some simple solutions. First, try using a tan remover or lemon juice and baking soda mixture to lighten the colour. You can also try applying a barrier cream or petroleum jelly to your palms and the soles of your feet before applying the self-tanner to prevent them from absorbing too much product. Alternatively, you can use a tanning mitt or glove to apply the self-tanner to these areas, as this will help to distribute the product more evenly and prevent any staining.
Wrapping Up: Mastering the Art of Self-Tanning.
Now that you have all the necessary knowledge and tools, you are well on your way to mastering the art of self-tanning. With the right products and techniques, you can achieve a flawless and natural-looking tan that will leave you feeling confident and radiant.
Remember, the key to a successful self-tan is in the preparation. Take the time to exfoliate and moisturise your skin before applying any self-tanning product. This will ensure a smooth canvas and an even application. Don't forget to choose the right product for your desired level of tan, whether it's a mousse, lotion, gel, or towelette.
When applying the self-tanner, be sure to blend it well and take extra care in hard-to-reach areas. This will help avoid streaks and patches. Wash your hands immediately after applying the self-tanner to prevent any staining, and give your tan time to develop before showering or coming into contact with water.
If you encounter any common self-tanning problems, don't worry. Streaks, dark spots, and uneven fades can be easily fixed with a few simple steps. Exfoliate, moisturise, and consider using tan remover products or lemon juice and baking soda mixtures to correct any issues.
As you continue your self-tanning journey, don't forget to take care of your skin. Moisturise daily and avoid activities that can cause your tan to fade quickly, such as swimming in chlorinated water or using harsh exfoliants. By following these tips and maintaining a consistent skincare routine, you can enjoy a beautiful and long-lasting sun-kissed glow.
So say goodbye to ghostly skin and hello to a radiant and bronzed complexion. With the knowledge and tips from this guide, you can confidently embark on your self-tanning journey. Remember to experiment, find the perfect products for you, and most importantly, have fun with it. Embrace the beauty of a healthy and natural-looking tan, and enjoy the compliments that come with it. Here's to your new sun-kissed glow!